모듈커널에 올리기
/*########################3-21#####################*/
#include <linux/module.h>
#include <linux/kernel.h>
int init_module(void)
{
printk(KERN_INFO "<1>Hello world 1.\n");
return 0;
}
void cleanup_module(void)
{
printk(KERN_INFO "Goodbye world 1.\n");
}
#######################Makefile#####################
obj-m += 3-21.o
#obj-m += 3-27.o
KDIR := /lib/modules/2.6.20-16-generic/build
all:
make -C $(KDIR) SUBDIRS=$(PWD) modules
clean:
make -C $(KDIR) SUBDIRS=$(PWD) clean
/*######################3-27####################*/
#include <linux/module.h>
#include <linux/kernel.h>
#include <linux/init.h>
static int __init hello_2_init(void)
{
printk(KERN_INFO "<1>Hello world 2.\n");
return 0;
}
static void __exit hello_2_exit(void)
{
printk(KERN_INFO "Goodbye world 2.\n");
}
module_init(hello_2_init);
module_exit(hello_2_exit);
#######################Makefile#####################
#obj-m += 3-21.o
obj-m += 3-27.o
KDIR := /lib/modules/2.6.20-16-generic/build
all:
make -C $(KDIR) SUBDIRS=$(PWD) modules
clean:
make -C $(KDIR) SUBDIRS=$(PWD) clean
========================3-21=======================
$make
$su
#insmod ./3-21.ko
#rmmod 3-21 <-kernel module remove
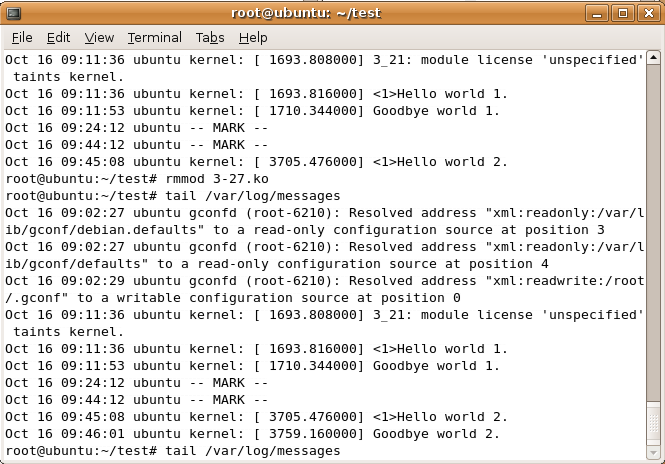
#tail /var/log/messages <-kernel log message print
#modinfo 3-21 <-module information print
========================3-27=======================
$make
$su
#insmod ./3-27.ko
#rmmod 3-27 <-kernel module remove
#tail /var/log/messages <-kernel log message print
#modinfo 3-27 <-module information print
-------------------------------------------------------------------------------------------------------------------------------------------
root@ubuntu:~/test# cat Makefile
#obj-m += 3-21.o
#obj-m += 3-27.o
obj-m += 3-28.o
KDIR := /lib/modules/2.6.20-16-generic/build
all:
make -C $(KDIR) SUBDIRS=$(PWD) modules
clean:
make -C $(KDIR) SUBDIRS=$(PWD) clean
####################################################
root@ubuntu:~/test# cat 3-28.c
#include <linux/module.h>
#include <linux/kernel.h>
#include <linux/init.h>
#define DRIVER_AUTHOR "Peter Jay Salzman <p@dirac.org>"
#define DRIVER_DESC "A sample driver"
static int __init init_hello_4(void)
{
printk(KERN_INFO "Hello world 4\n");
return 0;
}
static void __exit cleanup_hello_4(void)
{
printk(KERN_INFO "Goodbye world 4\n");
}
module_init(init_hello_4);
module_exit(cleanup_hello_4);
/*Get rid of taint message by declaring code as GPL.*/
MODULE_LICENSE("GPL");
MODULE_AUTHOR(DRIVER_AUTHOR);
MODULE_DESCRIPTION(DRIVER_DESC);
MODULE_SUPPORTED_DEVICE("TEST DEVICE");


 invalid-file
